No matter how good Wi-Fi gets, in terms of range and throughput, you can’t beat good old-fashioned copper wire. It’s reliable and fast. So, you’re probably reading this because you’re trying to do a DIY Ethernet cable installation, terminating the cables using RJ45 wall sockets. See all networking reviews The tricky part comes because there are two wiring standards, T568A and T568B, and your Ethernet connector probably has wiring diagrams for both (or possibly none). Here we’ll explain how to wire up the socket. First, it doesn’t really matter which scheme you use, since T568A and T568B are both ‘straight through’ configurations. That means that the wires from pins 1 to 8 connect to the corresponding pin at the other end. Unless you’re trying to create a crossover cable (which is unlikely), then you can use either scheme. But it’s best to pick one and stick with it for the sake of consistency. And you must use the same scheme at both ends of the same cable. Obviously. Depending on the socket you’ve bought, you might need an impact or punch tool (cheap versions such as this one cost under £5) to push the wires into the connectors.
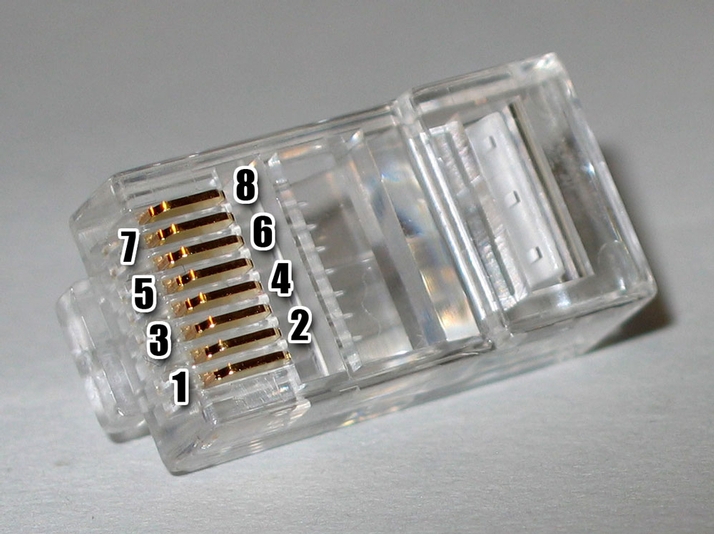
Here are the two wiring diagrams: Here’s how the pins are arranged on an RJ45 plug (the tab on the plug is on the underside in this photo):
Photo: Wikipedia Jim has been testing and reviewing products for over 20 years. His main beats include VPN services and antivirus. He also covers smart home tech, mesh Wi-Fi and electric bikes.